


Description
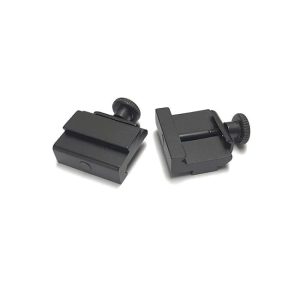
SMALL SQUARE BUBBLE LEVEL
Always ensure your scope and rifle are level with the portable and compact Small Square Bubble Level. Sold as individual units, you can buy as many as you want. Small enough to keep in your rifle case, rifle bag or pocket, you can take it anywhere! Align your scope horizontally or determine a slope. It is also useful in the workshop and around the house. Measuring only 40mm x 15mm x 15mm, this little tool is virtually weightless.
These are perfect for all firearms and air rifles. Mounting a magnified riflescope is, in fact, a fairly straightforward process. Focus, set eye relief, securely attach rings to rifle, torque screws evenly. Sometimes, when the rifle is first shouldered, we realize an important step was skipped: leveling the scope to the rifle.
Firstly, leveling a scope (and its reticle) to the gun is not the same as leveling the rifle during shooting. The latter action is critical for long-range precision. However, it can only be done with a riflescope that is properly mounted and leveled to the gun. Secondly, we are not leveling the optic to the eye, but rather to the rifle’s receiver. We reap three specific rewards for making sure everything is level and true:
- The scope’s windage and elevation adjustments will track horizontally and vertically on target.
- Aiming reticles (mil-based, ballistic) will work as designed for shots requiring reticle hold over.
- A level reticle is less distracting than a crooked one and helps the shooter level the rifle before taking a shot.
Use Two Levels
Using two bubble levels when mounting a scope ensures both the rifle’s base (like a Picatinny rail) and the scope’s reticle are perfectly level with the earth, preventing “cant” (tilting) which causes significant aim point errors at longer ranges, especially when shooting off uneven surfaces or props. One level checks the rifle’s base/rail (or even the action/barrel), while a second, often scope-mounted level, aligns the reticle to match, guaranteeing consistency for precise, repeatable shots.
Verify the Base: Use one to check the gun’s mounting surface (rail, receiver, etc.) to ensure it’s truly level with the ground/horizon.
Align the Reticle: Another level, often mounted directly on the scope tube (or eyepiece/turret housing), is then used to align the vertical crosshair with the level base, ensuring the scope’s reticle matches the rifle’s level axis.
Account for Cant: Cant (tilting the rifle) shifts the bullet’s point of impact dramatically at long distances; a 1-degree cant can mean a 6-inch miss at 1000 yards.
Check for Inaccuracies: Some scope turret caps aren’t perfectly flat or level due to threading, so using a level on the flat scope tube or turret housing base (not the cap top) is crucial.
Consistency & Repeatability: This two-step process eliminates guesswork, ensuring your elevation and windage adjustments work as intended, crucial for precision shooting.
How it Works
Firstly, place a level on the gun’s rail or receiver (you could use a level tripod as a base, too) to get the rifle truly level.
Secondly, mount the scope loosely and place a second bubble level on the scope’s tube (or a flat part of the turret housing).
Thirdly, align. Rotate the scope within its rings until the second level’s bubble matches the first level’s reading, confirming the reticle is perfectly vertical relative to the level rifle.
Finally, once aligned, tighten the scope rings, using consistent torque, and you’re ready for precise shooting.
Features
High optical clarity acrylic material
Precision machined internal radius
Internally fitted black lines give minimal parallax errors
For professional measuring and normal usage
SPECIFICATIONS
Material : Acrylic
Liquid Colour: Yellow/Green
Size: 40 x 15 x 15mm (1.57 x 0.59 x 0.59″)
Style: Square
Units: 1
Note
Sold as individual units.
Please allow 1-3mm error due to manual measurement.
Due to the difference between individual monitors, the colour of the product may vary from yellow to green.


Reviews
There are no reviews yet.